
Makerspace Lesson Plan: Build a Catapult
By Angela Rosheim
As makerspaces become more commonplace in the school setting, so do visits to my school library makerspace. I am currently in year four of running a makerspace and can’t believe the learning that takes place in our library as a result. Most educators who visit know that they want to start a makerspace or have been encouraged by someone to learn more about the maker movement. The most frequent question I am asked is, “How did you secure funding for all the materials you have?”
 Those of us in education are used to asking for donations, writing grants or bringing in materials from home for what we need and want for our students. After I describe all the grants and DonorsChoose projects that have funded my space, I also share what I have learned in the last few years while running our makerspace: You don’t need expensive robotics materials to give students the opportunity to learn through making!
I didn’t understand this when I first started my space either. I wanted all the bells and whistles for my kids, but I soon realized that it’s not the material that creates the learning; rather, it’s the design process that creates the learning. Just having students make will not automatically create deep learning — you need to have sound pedagogy to go along with it.
My experience tells me that educators sometimes struggle with how to incorporate making into a library or classroom environment. Some have found success by introducing the maker process through centers or by establishing weekly or monthly maker challenges. Through trial and error, I have found a process that supports my students as makers and learners — and it may work for you as well!
Here is the structure of my teaching environment:
- I teach in an elementary school that serves approximately 610 kindergarten through fifth-grade students.
- I am on a fixed schedule and teach six 50-minute classes a day on a four-day rotation.
- Kindergarten is the only grade level that checks out during their library specials; the other grade levels come and select books with their classroom teacher.
- I teach library standards, but I do not give grades.
I have successfully integrated maker projects into my lessons with the following method:
- Through the inquiry process we question, read, select best sources, research to answer our questions and cite our sources.
- We then begin planning, designing, making, testing, iterating, fixing, retesting and finally building the best prototype possible.
- Throughout the process we are continually reflecting on our work and on how to become better learners.
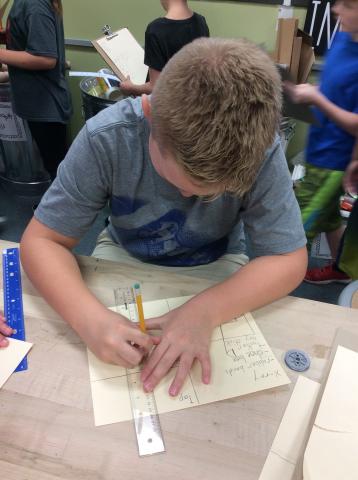
Below is an example of a maker unit that I have done with my fourth-graders. We have worked through this unit a couple of times, and each time I make changes to create a better learning experience for my students. This is also a great way to scaffold research and making so that kids can be successful working through Genius Hour projects. Of course, in order to make anything work in your own environment, you need to take ideas and create a process that works for you and your students.
Maker Project: Build a Catapult
Grade Level: 4th Grade
Supplies: Craft sticks, rubber bands, binder clips of varied sizes, pom pom balls, shoeboxes, boxes of varied sizes, plastic spoons, a tape measure and a good selection of recycled materials
21st-century Skills
Communication, collaboration, creativity, critical thinking, problem solving, flexibility, adaptability, productivity, initiative and leadership
Prep Work
- Set up a research template in Google classroom.
- Preview databases and websites for student success.
- Get supplies ready for controlled practice builds.
- Set up a Google Doc to record launch results per class.
Day 1
- Students are asked to brainstorm what they already know about catapults on their Google Classroom notetaking template.
- I lead students through identifying keywords to use for search purposes.
- I model/review for the whole class how to read for information.
- The rest of the time students spend reading for information independently or with a partner and jotting down questions they have. Students use Encyclopedia Britannica online and kid-friendly search engines to do their research.
Day 2
- We continue to read and answer our questions.
- Students cite their sources on their Google Doc. This is an opportunity to review when and why we need to cite sources.

Day 3
- Research continues.
Day 4
- Time to start thinking about building our own catapults. From our research, we are very familiar with what catapults look like, how they work, how they have been used throughout history and how they are still used today.
- We begin with a controlled build in order to learn what will work and won’t work when building our own designs for a catapult. Each table is given a supply of craft sticks, rubber bands, small binder clips and pom pom balls to launch.
- Students can work independently or with a partner.
- A designated launch area is established for kids to test their builds.
- Based on launch distances, students iterate their designs for improvement.
Day 5
- Students spend one more day rebuilding catapults using the controlled materials based on what worked and didn’t work last session — in other words, learning from failure!
Day 6
- Using what was learned with the controlled build, individuals or small groups begin planning and designing a catapult out of materials available in our makerspace.
Day 7
- Students continue planning and designing.


Days 8, 9, 10
- Build, test, fix, test, fix — and so on.
Day 11: Official Launching Day
- An official launch site is set up with a tape measure.
- Each group gets one test launch and two official launches with measurements taken.
- Results are recorded and a winning team is announced for each class as well as the entire fourth grade.
- We have discussions about why our catapults worked or didn’t work.
Day 12: Complete Launches and Final Reflection
- We spend a day reflecting on our catapult experiences. Each student takes time to complete the following phrases: I liked…, I learned…, I wish…, I would change…, Mrs. Rosheim could…. These reflections help kids determine what they learned from this experience and how they can transfer that learning to future projects. The reflections also help me improve the unit for the next group of students.
We follow this process whenever possible. For some of our maker units, such as designing a video game with Bloxels, our research helps us learn what we will need to design the best game ever. For example, we will answer the following questions:
- 1. How do Bloxels work?
- 2. What materials will be needed?
- 3. What planning process will work best?
- 4. What makes a great video game?
- 5. Who will be playing our games, and what difficulty level do we need to think about?
- 6. What will we do if we get stuck?
My goal for our library and makerspace is to have a balance of reading, thinking and making. I want my students to drive their learning, know that there are multiple ways to solve problems, be able to learn successfully with others and have fun while learning!
Author

This article originally appeared on the Demco Ideas & Inspiration Blog.